
You can never get a smooth and perfect wall if you haven’t primed the wall. So, before painting, make sure you have primed properly! Do you know how to apply primer paint?
If you don’t know it, don’t trouble yourself. We are here to help you out! We will tell you how to prime the wall before you get your hands on the pain!

Step by Step Process How to Apply Primer Paint on the Wall
If you still are confused about the paint primer, don’t be because you need it! Let us tell you how to apply primer paint to make future painting work easier and better!
Step 1: The Right Environment

No matter you are buying a primer for kitchen cabinet paint or your beauty room, the process is the same everywhere! First of all, you have to go through the area you are going to paint. In most cases, people thinking that painting requires attention but priming doesn’t.
But trust us; you have to keep the space clean. First of all, take a look at the wall and make sure there is no furniture. Move them to another place and keep the wall free. If you keep them in the same room, ensure that you have covered them well with a thick drop cloth or tarp.
Now that you are done with the furniture, you have to get your hands on the floor too. If don’t want to drop the primer on the floor and ruin it. For protecting the floor, get some tarp on it too.
Step 2: Prepare the Wall
You can do this step before or after however you like it. But keep in mind that cleaning the walls is a must. In most cases, the walls have residue on them when you plan to repaint them. But if you still have the residue, you have to remove it. Otherwise, the left residue will not let the primer stick to the wall properly. As a result, the paint will not stick to the wall and will come off afterward.
So, before everything, you have to examine the wall carefully. In this case, a hammer can help you. All you have to do is get a hammer and start pounding the nails. You have to do this below the surface of the wall you are painting. You can also try to pull them out carefully.
Here, try to get the help of the screwdriver. With this, you have to plunge screws deep into the wall. Again, carefully, you have to go below the surface, or you can remove them all too.
Step 3: Fill the Holes
Now, check for the holes in the walls. We bet there will be holes, and before priming, you have to fill them up. To fill them, try to use putty. With it, fill the holes evenly.
Then, all you can do is wait for some time! In this period, the putty will be dry completely. When you are done, you have to start sanding. However, do not go for rough sanding; be light.
Step 4: Clean the Wall
After sanding, you have to clean the wall and get rid of the residue left on the wall. You need soapy water for cleaning purposes. Take some water in a bowl and add soap. With the soapy water, you have to wipe down the walls carefully. Right after the cleaning, use a towel to remove the residue left on the wall.
There are also times when you need to prime only some specific area of the wall and not the whole. In this case, get the painter’s tape and place it on places where you do not want to prime. It can also help you in creating a border for the next painting session.
Step 5: Choose the Primer
After you have moved everything and cleaned the wall properly, the wall is ready to be primed. Now, the most vital question in this situation is which primer you are going to use. No, not every primer is the same, my friend. The preference of your primer will tell you how the eventual result of the paint will be.
So, before you pick up one, stop and think. In this case, you have to pick up between latex and oil paint primers. When you want a primer that is highly easy to apply and is super flexible, settle for the latex paint primer. When there is a chance of peeling or cracking, these sorts of primers can help you a lot in preventing those.
Also, the best part of latex paint primer is that you can clean it easily with only a bit of soapy water! So, your wall will stay clean forever! On the other end, you can also get the oil-based paint primer for your walls. This will help the wood penetrate deep, and along with this, it will prevent tannin in your wood. As a result, it won’t be visible on the wood or come over the surface!
If you have a milled lumber surface, this primer can be your holy grail. However, it is always better to talk to the home improvement staff to know more about which primer will be the best bet for you. Also, you have to keep in mind that the choice of the primer also depends on the color you are going to paint your wall with.
Step 6: Prepare the Primer
So, now you have got the primer on your hands, and almost everything is ready. You can start by using the primer. But before that, when you buy the primer, make sure the sellers shake the primer properly in the store.
In some cases, primers have been unused for a long period. When you start the project, in this case, you have to stir the paint primer properly from the bottom of the bottle. It will help in reintegrating all sorts of chemical separations.
Step 7: Prime it
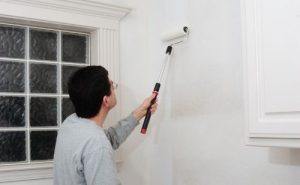
When the primer is ready to be used, get a paint tray for the work. Now, with the help of a paintbrush, take some primer and start applying. Start from the edges of the wall. You have to brush away from the painter’s tape. This will help you keep the primer from going under the masking tape. Start priming the whole wall, but be careful on the edges.
After you are done applying the primer, get your hands on a paint roller. With this process, you can easily remove the additional paint primer. Also, you can cover the whole wall with precision if you use a paint roller. After this, again, you have to get to the paintbrush and, with that, start overlapping the whole area again with accuracy! Congratulations, you are done!
Wrap Up
Priming the wall is not difficult if you keep the primer and the other necessary objects around you. All you have to do is find the right primer and start priming; nobody is stopping you!
Write to us about which primer worked best for you. Also, don’t forget to mention if you like the wall without primer or primed!
You May Read Also
- What Finish Paint for Bedroom Is Good | Pick the Perfect Finish
- How to Paint a Bedroom Wall | 6 Easy Steps for Bedroom Painting
- What Is Paint Primer & How Does Paint Primer Work?
- How to Paint a Kitchen Cabinet in 7 Easy Steps
- How to Paint a Cabinet White (5 Easy Methods)