 In this world of ready-made seasoned cast-iron skillet pans, cooks love seasoning their skillets a bit extra! So, you must learn how to season a cast-iron skillet at home!
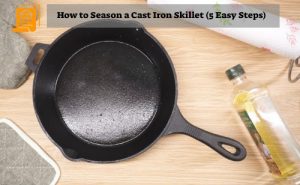
Here are some easy steps for seasoning cast iron skillets with handy products and without hassle! Have a look!
Step-by-Step Process How to Season a Cast-Iron Skillet
If the seasoning of your 12-inch skillet frying pan is no longer producing the desired result, it’s time to study how to season a cast-iron skillet!
Step 1: Clean and Dry
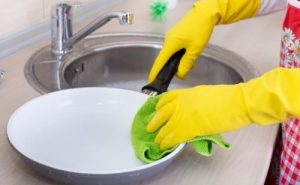 You can start easily when you plan to learn how to season a cast iron frying pan. But before everything, start with the cleaning process. Some people will skip this step, but trust us; it is the best step you can begin!
So, start cleaning the cast iron pan you want to season. Could you give it a proper wash? Get some soapy water. We recommend you get some warm water and add some soap to it. Make a soapy warm water mixture for cleaning. After cleaning it correctly with the soap-water mix, you have to dry it. Remember that drying it is a must before you start the seasoning. Get a towel and dry it down.
However, we often see that towel drying is not enough as there is always some water left. For this, you can try a better method. Go to the stove and switch it on. Now, place the pan on the stove and let it get hot on the stovetop flame for some time. It will require only a minute or two to make it hot and remove any lingering water!
Step 2: Oiling and Buffing
 When the cast-iron skillet is adequately cleaned and dried, you can go to the next step, where you need oil. Get some cooking oil and then start rubbing the pan with it. Yes, you have to rub the oil all over the pan. The inside should be rubbed with oil properly. Do not forget to rub oil in the outer parts of the pan.
You might forget the handle, but please don’t! The handle requires seasoning too! While choosing oil, the best thing you can do is get unsaturated cooking fats.
You can pick up vegetable oil, corn oil, or canola. These can easily spread. Here, all you have to do is rub the oil all over and buff it properly.
You have to buff it so that the skillet pan doesn’t look greasy! Ensure there is no excess oil on the pan, not even the slightest. Otherwise, it will pool during the seasoning work.
If you don’t do it properly, the additional oil will turn into hardened droplets on the pan’s cooking surface, which might become sticky. So, buffing accurately is necessary.
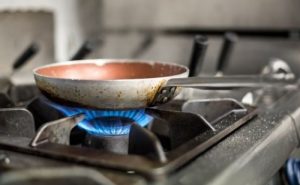
Step 3: Heat it up
 Now that you are done with the oiling and buffing process, heat it. We know you are thinking of the last heating method, but you don’t have to place it on the stovetop here. In this step, we recommend the oven method. First, preheat your oven. Go to 450 degrees Fahrenheit and preheat the oven.
When the oven is preheated, keep the temperature the same and place the oiled pan inside. Now, set the timer for 30 minutes. We know you are thinking of the smoke, and yes, it might get a bit smoky.
The oven should be in a well-ventilated area. If you are working in your kitchen, make sure the ventilation method is adequate. In this process, the oil will be polymerized.
When you settle for stovetop burners in this step, the heat may produce hot and cool spots on the pan’s surface, resulting in uneven seasoning.
No matter how high-grade the stovetop burner is, the result will be the same. So, we recommend you get the oven to do this job. This will provide uniform heat to every part of the pan, ensuring even seasoning.
Step 4: Keep Repeating
 After you are done with the 30 minutes of heating the pan in your oven, you can take it out. When you switch the oven and take the pan out, ensure you have enough protective gear to protect your skin because the pan will be too hot to hold with bare hands. After taking it out, you must add more oil and rub it over again.
After rubbing it properly, you must buff it once again to ensure that no oil is dripping down. In short, you must repeat the same process we mentioned above without cleaning it with water.
When you are done oiling and buffing, put the pan in the oven again for the next seasoning session. Set the timer for 30 minutes and heat to 450 degrees Fahrenheit. After the next 30 minutes, it will overtake the oven.
Proper seasoning requires repeating the process. Repeating the process three to four times will give you the best result and help you set the perfect initial layer of seasoning!
Step 5: Ready to Cook
 When you have tried the whole method 3 to 4 times, take the pan out of the oven, and you are almost ready. Let it cool down for a few minutes. After this, you will see that the skillet pan is ready for cooking! You might want a better, far better result than this; you can rely on a baking sheet too.
After buffing properly, you can turn the pan upside down and put a baking sheet underneath it. This will help you get rid of the extra oil with insurance! Also, flaxseed oil might be very popular for seasoning purposes, but we do not recommend it for this work, as it can flake off over time.
Wrap Up
These steps are the easiest way to season a cast-iron skillet and prepare it for better cooking. If you haven’t tried it yet, do so! You will love it! Thanks for reading. Happy Cooking!
You May Also Read