It is not possible to throw away expensive cast iron skillets every time they get rusty. So, how can they be brought back to life? How can they be cleaned and seasoned at home?
Don’t worry! I have an easy trick for cleaning your rusty cast-iron skillet without too much equipment and ingredients! All you need to do is to get ready for it, and you can clean it at home!
Check the process and do it!
Step-by-Step Process on How to Clean a Rusty Cast-Iron Skillet
Follow these steps when your 12-inch frying pan skillet of cast iron is rusty! You will surely end up getting a new skillet, I bet!
Step 1: Scrubbing
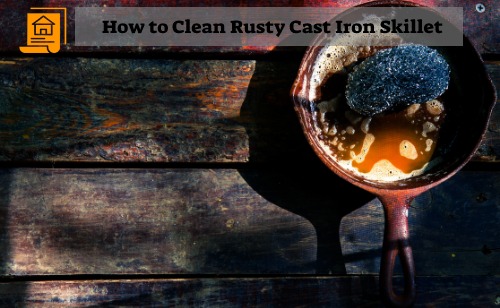
Yes, you always hear that you have to be gentle with cast iron skillets. But it is time you forgot it! Yes, you heard right! If you are planning to learn how to clean a cast-iron skillet while preserving the seasoning, it is necessary to be very gentle with any appliance made of cast iron. If you read about iron, you will know it is virtually indestructible.
So, all you have to do is strip away the layer of rust from your cast-iron skillet. If you are worried about the seasoning, then let us tell you: I will season it later, so forget about the seasoning for the time being. You will need elbow grease to clean it in this position. Also, a hard, abrasive tool is necessary here. First, wet your pan with some water and add some soap.
Get your hands on the scrubber in this position and start the scrubbing process. You should get a tough sponge for this part. While scrubbing, ensure you follow in a circular motion, and the circles should be small. This process requires time and energy. Keep scrubbing until you see the iron underneath the seasoning. After a while, you will see the black iron inside.
Step 2: Rinsing
You must remove the rust to learn how to clean a rusty cast-iron skillet! Once you see the original iron beneath the seasoning, be sure that you have some copper-brown mush. Things are already dirty now, so it is time to remove the dirt. For this, get some water and start cleaning it with water.
Keep in mind that the rinsing process is necessary so that you can proceed to the next step without spots of gunk. After rinsing, proceed to the next part of scrubbing. Yes, you are going to scrub it once again!
Get a soft, soapy sponge, throwing away the previous tough sponge. Start scrubbing with the soft sponge so that you can clean the whole skillet once again. Remove all the rusty bits and the residue left there. Now, you can move to the next step of the drying process.
Step 3: Drying
When you see a properly cleaned cast-iron skillet, emphasize drying it. In this position, the skillet will look normal. However, there will be no seasoning at all. The cast-iron skillet in this position will have a matte finish that is dark gray.
Now, search for a clean dish rag. With this dishrag, dry the cast-iron skillet slowly. After you are done using the dishrag, there will still be some water on it. To make the drying process faster, switch on the stove. Turn on the heat, hold the skillet, and place it on the stove.
You must keep the skillet on the stove for a few minutes. Slowly, the moisture that is on the stove will start evaporating. After a few minutes, the skillet will be completely dry and ready for seasoning.
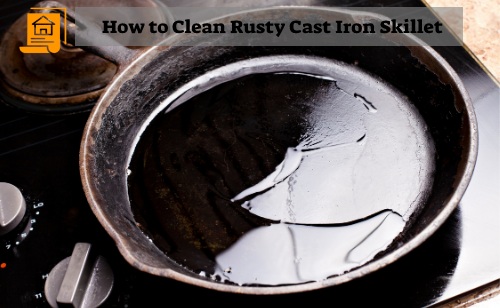
Step 4: Spreading Vegetable Oil
Now that you have learned how to clean a cast-iron skillet with rust, it is time to re-season it. As you have already removed the previous seasoning, it is not yet ready for the cooking procedures. So, seasoning is a must in this part. The skillet is now on its base layer. For the seasoning, you must get your hands on some vegetable oil.
Now, first, drop one tablespoon of vegetable oil on the skillet. With the help of a paper towel, spread it all around the pan. If you don’t want to use a paper towel, you can also try using your finger. However, make sure that the whole pan gets the vegetable oil evenly. Also, ensure you do not burn your finger or the paper towel.
So, after the previous step, let it cool down, and then move to this step. Along with the inside portion, you have to spread the vegetable oil out of the cast-iron skillet too. Here, don’t forget the handle, my friend.
Step 5: Heating
After spreading the vegetable oil on the whole body of the cast-iron skillet, you have removed the extra oil. As you have used oil, you will surely see soil dripping down the cast-iron skillet. All you must do is wipe off the excess oil to work correctly.
Remember that when pouring oil, you must take only a drop of oil and not more. All I need is a lightly greased pan and nothing else! Search for a napkin and slowly wipe the extra oil from the pan. Now, get your oven ready. Could you set it to 350 degrees first? Then, purchase some aluminum foil. Check the bottom rack of the oven and place the foil on that part.
You must place the skillet on this foil to ensure the seasoning process is done accurately. Take the skillet in your hand and put it inside. Certify that you have placed the skillet upside-down on the upper rack of your oven. Here, you have to keep it for about 60 minutes. After heating it for one hour, it will be almost ready.
Switch off the oven and wait for it to cool. You are done! If you want a glassy finish, repeat the seasoning process and make it the perfect cast iron skillet for your everyday food!
Wrap Up
Isn’t it easy to clean a rusty cast-iron skillet? Yes! All you need is a bit of time and a little effort! You don’t need to throw away your skillet because it is rusty! Clean it off, put in new seasoning, and you are ready!
Remember to check out other kitchen solutions! You can find all the kitchen solutions here. Check for them on our site and make your cooking life interesting!