
A paint sprayer is a small pneumatic tool used to spray paint on surfaces. This is a device for applying liquid material with pneumatic spraying.
The use of a paint sprayer for painting surfaces will save you time and money while avoiding environmental pollution caused by spray cans of paint.
To create an even and high-quality coating when painting with water-based or powder paint, experts recommend using a paint sprayer. Let’s go know about how to use a paint sprayer.
Ultimate Guide To Use a Paint Sprayer for Cabinets?

The paint sprayer has remained an indispensable tool in everyday life and production for more than 100 years. Most often, with this sprayer, it is recommended to use quick-drying materials. The sprayer has several undeniable advantages:
- Firstly, it can be used on various surfaces
- Secondl, ,becauseof theee simplicity of the design, it is not demanding on special paints; it is ready to work with any liquid;
- Thirdly, it does not require training, just read the instructions for use;
- Fourthly, there will be an increase in productivity since the painting speed is much higher than with a brush or roller.
Preparation Before Using a Paint Sprayer

First, choose the clothes. The casing must be made of nickel-plated aluminum to prevent rust. pauseiy included. But there are also transparent plastic tanks (this is a cheaper option).
Check the hole in the nozzle cover for damage and irregularities. It is also advisable to pull the trigger several times to check the accuracy of the needle.
Next, look at the gaskets, because tightness is significant. The most reliable gaskets are put in a professional paint sprayer since there are solvents that can damage them.
- A large selection of paint sprayers for painting is offered in the modern market. They can be divided into three types:
- Pneumatic (using compressed air);
- Electric (works from a conventional outlet and does not require additional devices, this version is considered the most economical for homework);
- A hand-operated sprayer (the necessary pressure is generated mechanicals, pour paint into the tank, pump the pump, and the sprayer starts to work).
How Work is Carried Out?
As a rule, work is carried out on special surfaces. If you are working in a house, cover the surrounding objects and the floor with film, as paint splashing is inevitable.
The surface to be painted should not contain any dust and should also be dry. If the work is carried out outdoo, – pay attention to humidity.
You should not start painting in fog, frost, before the rain, in windy weather – to avoiappearingof condensation and the formation of air spaces between the object and the paint.
Following the instructions, carefully assemble the system. Run a certain amount of solvent to ensure proper operation.
In preparation for painting a large surface, paint something small. Fill your hand and get a feel for it. The farther you divert the nozzle from the surface, the larger the stain.
On a flat surface, the paint sprayer is moved horizontally and in parallel. This ensures a uniform application. On a curved surface, you move along an arc, keeping the same distance from the surface.
Process the angle in one go from top to bottom. When painting the grille, install a backing – so save paint. Upon completion of work, it is necessary to clean the sprayer following the instructions attached to it.
How To Use a Paint Sprayer?
First, determine the order of application of the finish on the surface of the product. Divide the product into zones “A,” “B,” and “C,” marking zone “A” the most significant place.
For example, the upper part of the cabinet can be considered zone “A,” the less visible upper sides of the cabinets – zone “B,” and the lower sides of will be zone “C.”
Treat these zones alternately in the reverse order from “C” to “A” so that the inevitable excess of the finishing composition from less important places would disappear when finishing the most significant surfaces. For consistent results, prioritiprocessing of zones in each product.
In the beginning, pull the trigger to turn on the paint sprayer, not in front of the surface to be painted, but at its edge.
Keep the spray gun at the same distance from the surface throughout the passage without tilting it up or down. Do not mix the sprayer in an arc.
Release the trigger only when the torch stream extends beyond the opposite edge of the surface. Always apply trim strips in the direction of the wood fibers in the same way as when brushing.
Cover the edge of the previous strip with the next passage. As with brush finishing, the texture of the wood masks the uneven overlap of adjacent strips that may be noticeable.
Look at the surface under oblique lighting, the reflections of which help to see that the stripes of coverage evenly overlap, forming a continuous film.
If you notice a small unpainted strip or stain, immediately spray a little finish, moving the sprayer faster than usual to prevent excessive coating in one place. Do not spray the finish in thick layers on vertical surfaces to avoid sagging.
The coating will be smoother if you apply several thin layers instead of one or two thick layers, which often form streaks or the so-called shagreleatheHethethe texture of the wood masks the uneven overlap of adjacent bands that may be noticeable.
What You Should Know When Painting With a Paint Sprayer?

When working with a paint spraytherehare somesome things you you ought to know;
- First of all, you need to clearly learn how to prepare the paint for the paint sprayer correctly.
- Smudges may appear at the edges of the coating due to too much airflow. To eliminate this, the airflow should be made smaller, or a more viscous composition should be used to refuel the paint sprayer.
- Abundant streaks may appear on the cabinebecausethe the excess flow of the composition that passes through the nozzle. It is necessary to reduce flow empirically. You may need to make the airstream a bit stronger.
- After applying the paint, the stain looks dusty. This probis mostmost ofaccuraciesausethe the too-high viscosity of the paint. This is eliminated by diluting the paint to a suitable working consistency, which is achieved experimentally.
Painting cabinets with a paint sprayer is simple and convenient. The surface will become smooth and of high quality. Paint is minimally consumed, and time is short. Besides, it is possible to apply putty with a paint sprayer or other compositions.
How To Prepare a Paint Sprayer for Work
Before working with a paint sprayer, it must be properly assembled with your own hands.
- The handle and the selected nozzle are attached to the body of the device, which rotates until they click.
- The air hose is connected.
- When assembling the structure, make sure that the hoses are not kinked or pinched. Otherwise, the supply of paint will be difficult.
- Adjuthinkingn of the nozzle in a vertical and horizontal position.
- The regulatoradjustalloaryary, to change the supply pressure of the composition.
When Carrying Out Painting?
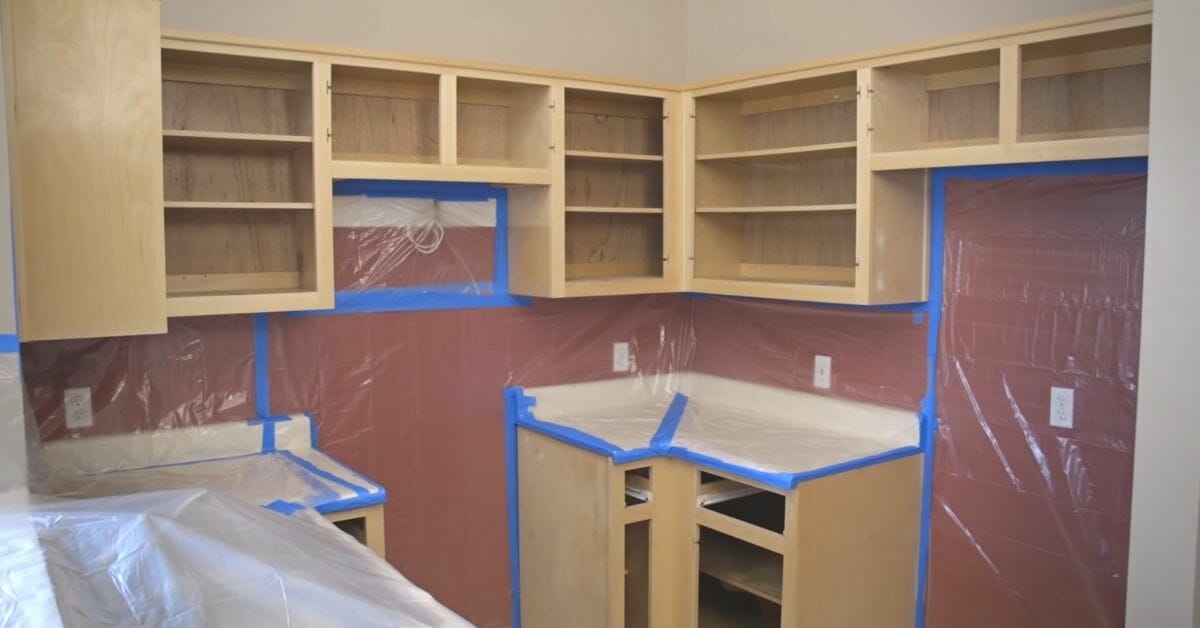
- All surfaces, sockets, and switches are protected with masking tape so that the paint does not damage them. Before that, the holes are sealed.
- Wires are shielded to prevent injury.
- Protected door and window openings, and baseboards, are not subject to staining.
- The paint is poucountryaary, the composition is colorized
- Before work, two test strokes are done to determine the uniformity of the surface and the required shade.
- The paint sprayer must be kept strictly at an angle of 90 Â.
- The surface is coated properly.
Steps Involved in How To Use Paint Sprayer
Choose paint and solvent
Oil-based paints are the easiest to use in spray guns, but acrylic and latex paints can also be sprayed. Adding solvent to the paint will allow the paint to become thinner and more easily pass the spraying procedure.
Prepare the surface to be painted
Put protective covers on furniture, and spread something on the floor. To paint “immovable” surfaces, as shown here, you will need to protect all surrounding objects and surfaces from paint, as well as provide good ventilation in the room.
- Protect nearby surfaces from droplets of spray paint with masking tape or newspaper. When painting surfaces in windy weather, paint can fly further than you can imagine.
- Put the paint and paint thinner on an appropriate surface so as not to spoil anything valuable with spilled drops. Wear a mask or respirator, goggles, and gloves.
This will allow you to remain unstained and protect against hazardous fumes and suspensions.
Prepare the surface to be painted
Sand, peel, or sand rust and corroded metal, remove grease stains, dust, or dirt, and make sure the surface is dry. Wipe the surface: for painting with oil paints, use white spirit for cleaning, for painting with latex or acrylic paints, use water and soap. Rinse thoroughly.
Paint the surface
After the surface has been prepared, you can then start your work
The process of using a paint sprayer is very simple, right? After going through the above guide, you will know how to use a paint sprayer.
You May Read also