Some people find not having attic access problematic. For this reason, they ask how to replace a bathroom exhaust fan without attic access. However, it is not a big deal.
Because you can do everything related to the replacement of the underside. You don’t need to worry about attic access. If you are searching for some ways to replace your bathroom exhaust fan.
You are on the right site. In this article, I will provide a brief guideline for this. So, let’s get down to business.
Things to Consider When Replacing a Bathroom Exhaust Fan
Step 1: Checking the housing & the size of the duct
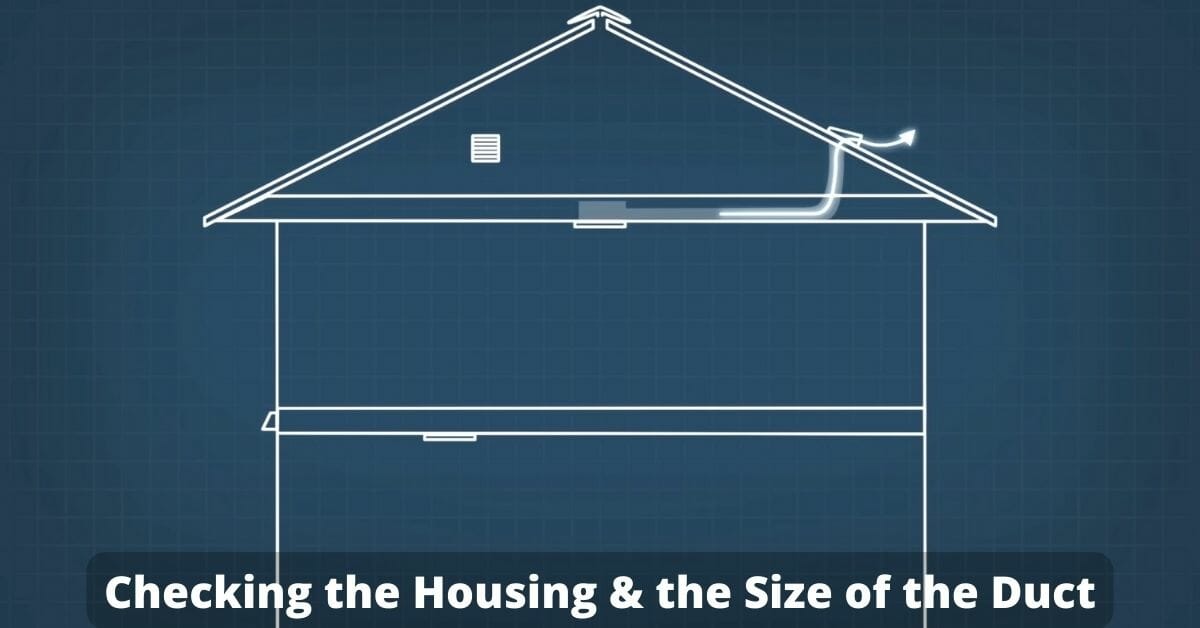
Well, do it before you buy an exhaust fan. When you decide to buy, make sure the size of the duct and the housing of the fan are the same. If your fan is larger than the housing, then you may need to cut the drywall.
Similarly, check the duct size as well. Measure it carefully because these measurements are related to the vent size and the adapter you will buy. The size may influence the efficiency and the noise your bathroom exhaust fan makes.
Step 2: Buy Wall Switches if You Need

You can operate the exhaust fan with the old switch. However, many use a fan with a heater, light, and humidity sensor. You can buy new wall switches if you are also doing the same.
It will allow you to control everything separately. An expert electrician may be needed to fix the wall switches, but you can complete the replacement work yourself.
Step 3: Make Decisions about Extra Features
Another important decision is whether or not to add new features. Modern bathroom exhaust fans have many extra features that may attract you.
Well, think about it even before buying the fan. Once you finish these, let’s discuss how to replace a bathroom fan without attic access.
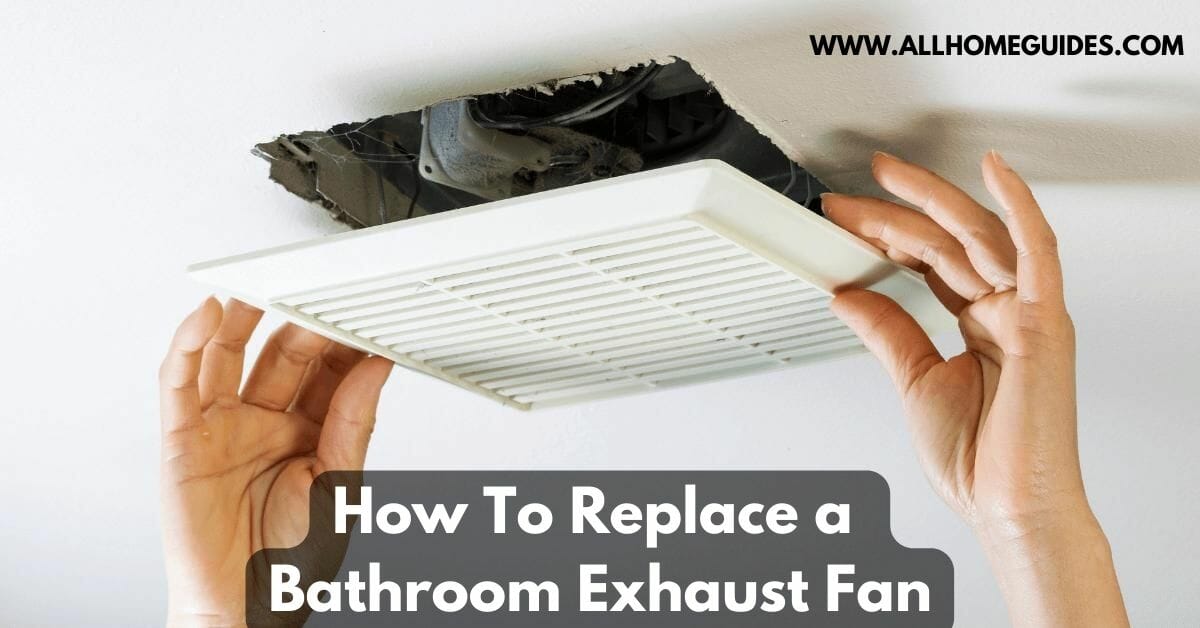
Part 2: Remove the Old Fan
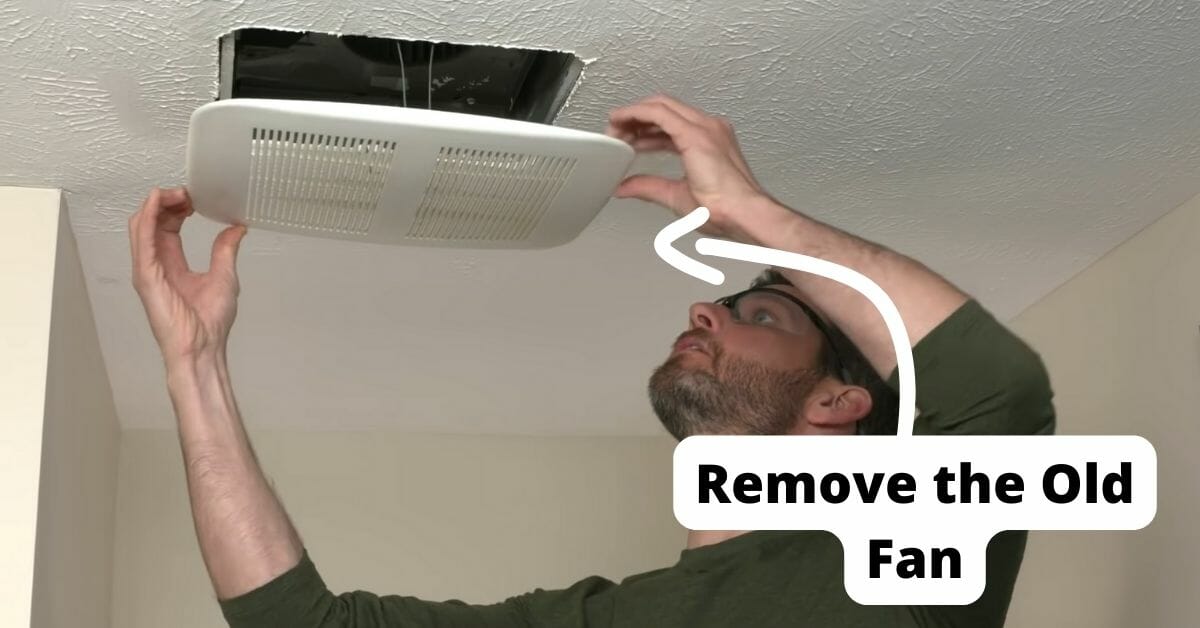
Since you have bought a new bathroom exhaust fan, it’s time to remove the old one. Follow several steps here as well.
Step 1: Turning the Power off
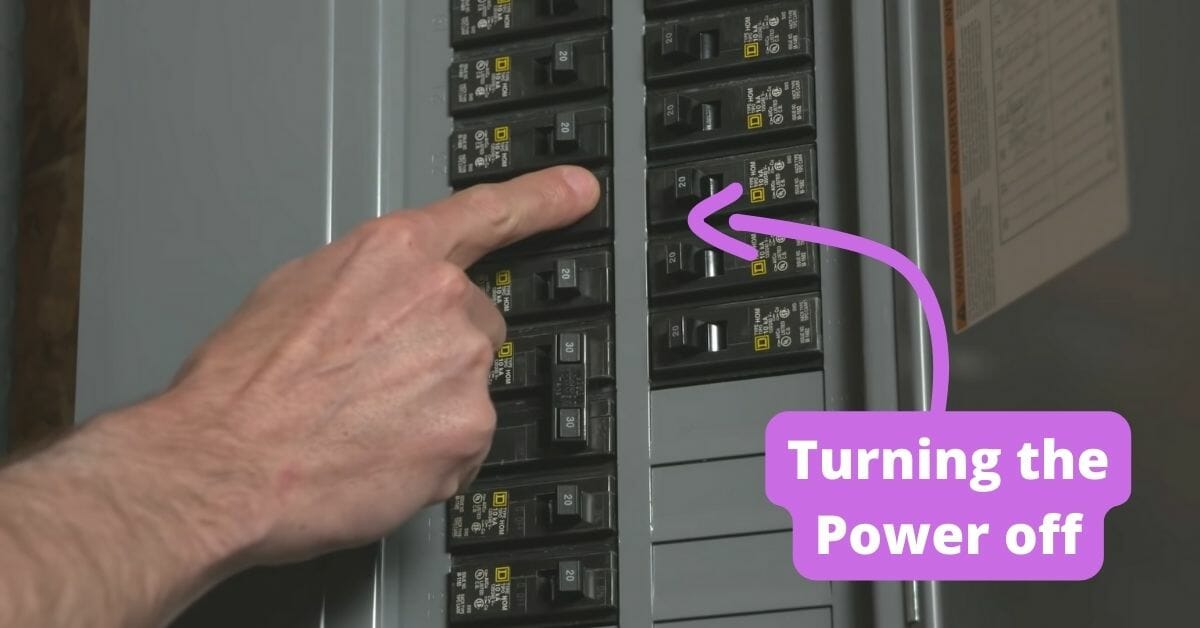
Turn the power off while replacing the bathroom exhaust fan without attic access. God forbid you don’t want to get electrocuted while doing simple work like this. Find out the breaker for your bathroom line on the panel box.
The light and the bathroom outlet will no longer be powered, which means you have turned the power off. Use a voltage tester to make sure there is no electricity inside the exhaust fan wires.
Make sure the voltage tester is non-contact. The tester will beep if there is power or no sign of power.
Step 2: Removing the Grill on the Bath Fan
In this step, remove the grill from the bath fan. Sometimes, there is a plastic cover. You should remove this. Bring the plastic cover down. You will find a gap between the ceilings.
Two metal clips will be there to fix the cover to the housing. Now, squeeze the clips inward and release them. Then, complete the task by pulling off the cover.
Step 3: Removing Fan Motor
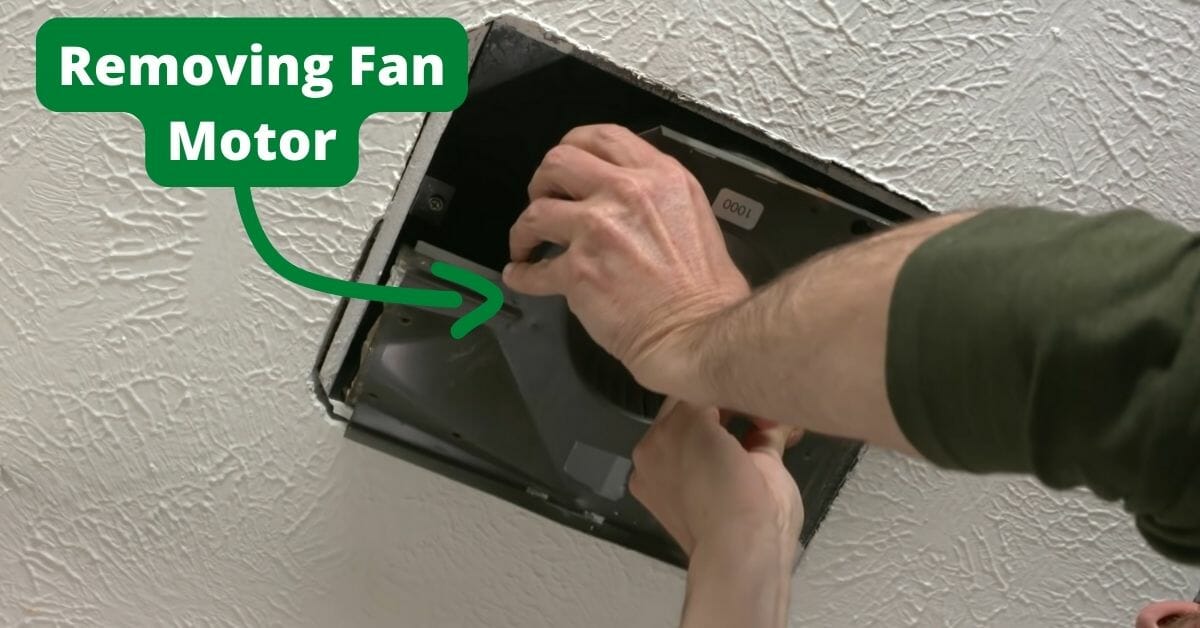
Another vital step toward replacing bathroom fans without attic access is removing the fan’s motor from the housing.
In most cases, the housing is attached to the ceiling joists. Use a screwdriver to remove one or two screws you will find here.
Sometimes, you will see a plug inside the housing for the motor. Unplug the fan before you remove the motor from the housing.
However, if your exhaust fan does not have a plug here, you can disconnect the wiring manually by removing the wire nuts.
Step 4: Getting the Main Fan Housing out of the Ceiling

This step might seem a little tricky because you have to remove the main fan housing from the ceiling. The ceiling joist holds the fan housing tightly.
Remember one thing in this segment. If you are going with the same model, you don’t need to remove the old housing.
Usually, there are several screws to connect the housing to the ceiling joist. Don’t hurry and stay careful while doing this job. Because of a simple mistake, you may damage the wooden joist.
Step 5: Disconnecting the Duct and Wiring
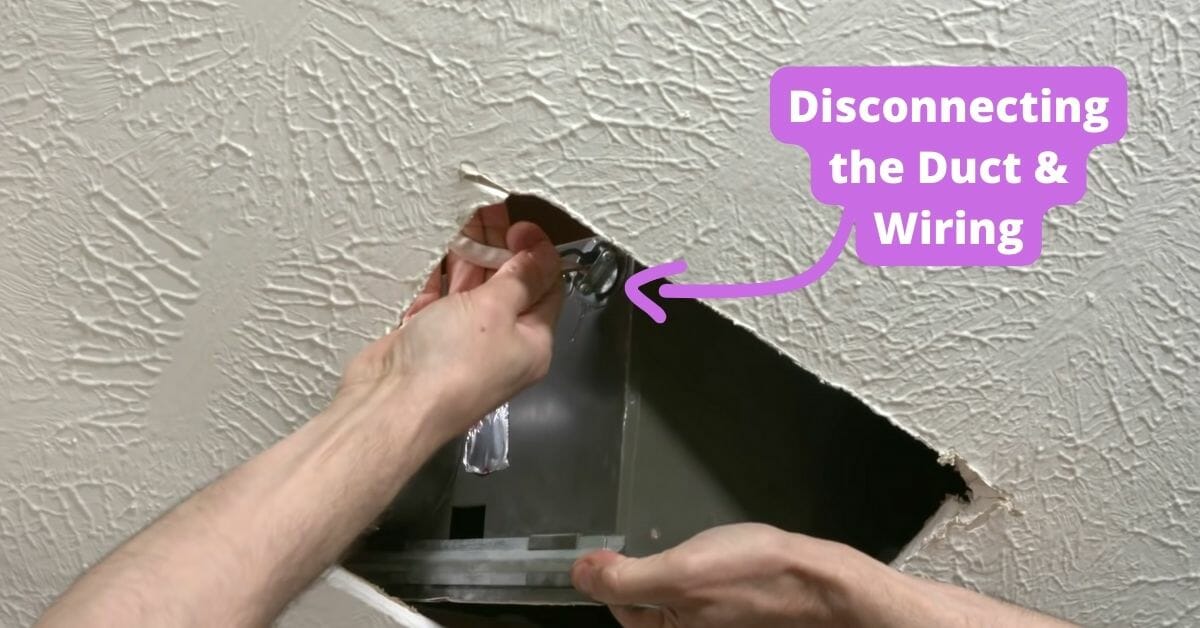
You must disconnect the duct and wiring from the fan housing. Usually, we see the duct is fastened to the exhaust fan by foil tape.
Otherwise, you will find a zip tie hanging from the duct. Cut the zip tie. As you remove the vent duct, it’s time to remove the electrical wiring lines.
Part 3: Installment Session
Step 1: Check the new fan size

After removing the previous fan, check the new exhaust fan size. Put the new exhaust fan into the ceiling hole to see if it fits. If the new fan housing is larger, trace a new hole in the ceiling.
If it is too small, use some wood to install the housing securely. Then, attach the exhaust fan to the ceiling joist.
Step 2: Drag the wiring through the fan housing
After confirming the size, drag the home’s wiring through the new exhaust fan housing. If your exhaust fan has a junction box, remove that.
If it doesn’t have one, ignore it. Just pull the wiring through the fan housing and connect it to the motor wiring. Once you have dragged the wiring, secure it using a bushing or grommet. This will keep it safe from damage.
Step 3: Connect the flapper or duct connector to the fan housing
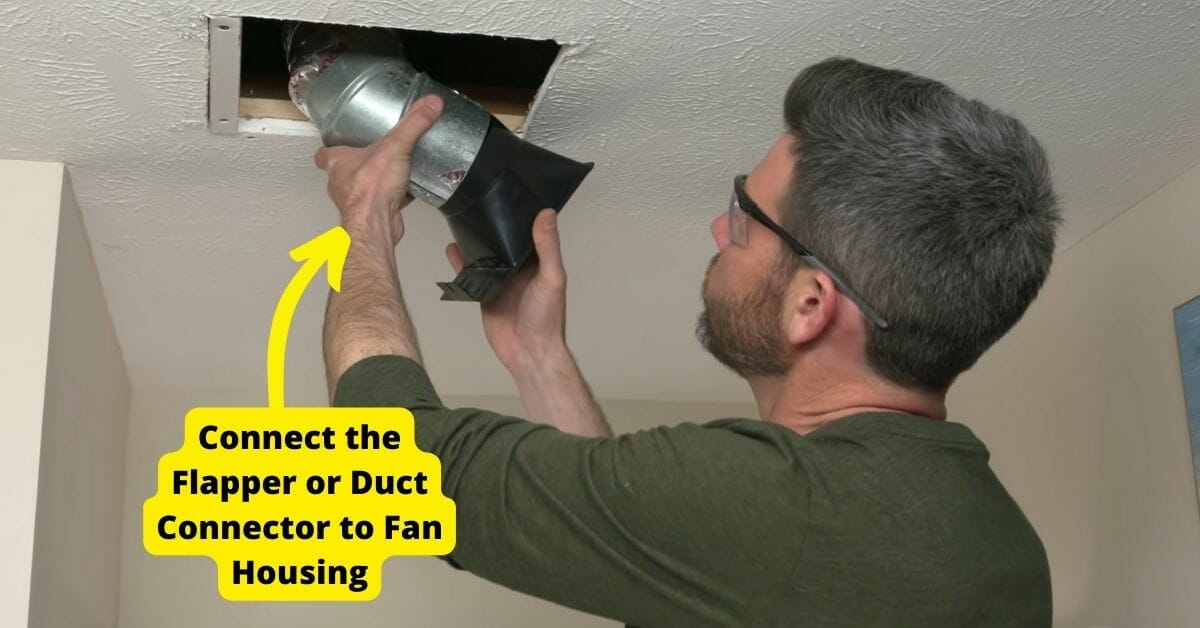
You can install a duct connector in two ways. Either connect it to the foil tape or line up the fan housing setup.
The second way is to connect the flapper to the exhaust fan housing and push the metal fan housing into the ceiling.
Step 4: Connect Electrical Wiring to the New Fan Motor
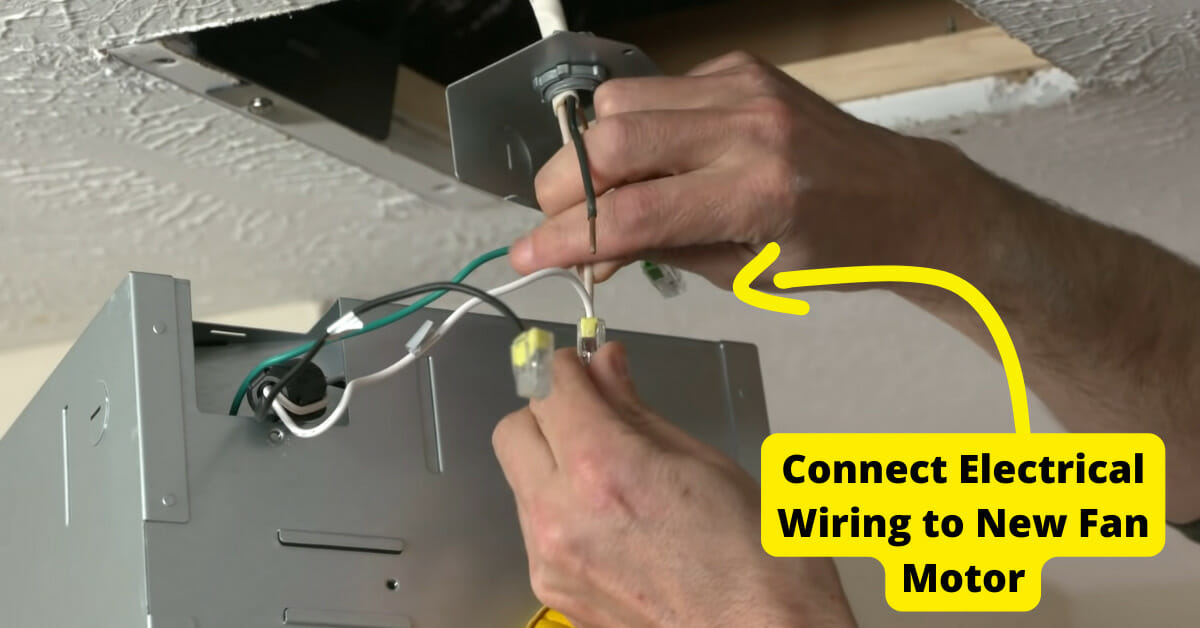
You are almost done. The fixing part is okay. It is time to connect the electrical wiring to the fan motor.
Before that, remember to secure your assembly. You have dragged the wiring through the fan housing, but have not connected it yet.
Now do that. Most exhaust fans have the facility of quick connecting, which allows you to insert wires inside the connectors.
Some other exhaust fans have a different connection method. Twist the wires and twist the wire nuts again .
Step 5: Seal the fan housing
After connecting the electrical wiring, avoid air leaks. To do that, use caulking so that it avoids air leaks. You can use metal or foil tape.
Step 6: Re-Install the grill or cover
Your fan is almost installed. Now reset the grill to where you pulled it. As you remove the cover, do it in reverse. Squeeze the metal clips after inserting them into the holes of the fan housing.
Step 7: Turn the power on and see if it is working or not.

Now turn on the power and see how it works. If you buy a quiet fan, it is hard to recognize whether it is on. Take toilet paper to check.
If you are still confused about replacing a bathroom exhaust fan with a light, let me clarify one thing. The process is almost the same. Just take care of the light while installing the new exhaust fan.
FAQs:
How can I clean my exhaust fan?
Answer: It is straightforward. Just switch the circuit breaker off and open the grill. Remove the metal clips and clean the holes. A vacuum cleaner is perfect for instant cleaning. After cleaning, reinstall the cover.
Where can I find the model number of my exhaust fan?
Answer: Look at the sticker inside the fan housing. The model number is usually found there. Remove the grill and find out the model number.
What is meant by CFM?
Answer: The elaboration of CFM is Cubit Feet per Minute. That means the measurement of airflow in a single minute.
Can I install my exhaust fan on a wall?
Answer: The answer is yes. You can do it if you want to know how to install a bathroom exhaust fan without attic access on a wall instead of the ceiling. Usually, we install exhaust fans with light or heating functions on a wall.
The final touch
To finish it off, I would reassure you that you can replace your bathroom exhaust fan with minimal problems. However, attic access lets you do that more convenient.
However, you can install it easily by following the steps discussed here. I hope the guidelines will help you along the way.
You May Also Read